This gluten free pizza crust happened on one of those nights where I opened the fridge, stared into it like it might offer life advice, and decided pizza was the answer to everything. Plot twist. I didn’t have regular flour. Or a plan. Or honestly much patience.
I remember thinking, this probably won’t work, but let’s see how bad it can get. I’d tried gluten free crusts before that tasted like sad cardboard coasters. This time, though, I was tired and hungry enough to keep going anyway.
I almost forgot to preheat the oven. I definitely questioned the dough halfway through. But when it came out of the oven, cracked a little, smelled like actual pizza, and didn’t fall apart in my hands, I felt like I’d accidentally won something. Since then, this crust has become my go-to whenever I want pizza without the drama.
Why I Keep Making This Dish (The Real Reasons)
- Hard to Ruin: I’ve underbaked it, overbaked it, and once forgot the salt. Still edible. Still good.
- Comfort Level High: Pizza just makes a bad day less loud.
- No Fancy Skills Needed: If you can stir things and push dough around, you’re qualified.
- Works With My Mood: Some days it’s loaded with toppings. Some days it’s basically bread with sauce.
- Feels Like Cheating: People hear “gluten free” and think effort. I barely tried.
- Good Solo or Shared: I’ve eaten this alone on the couch and also pretended it was a party dish.
- Leftovers Exist: And honestly, that matters more than we admit.
Tips I Learned the Hard Way
- Warm Water Matters: Too hot kills the yeast. I learned that the quiet, disappointing way.
- Let the Yeast Do Its Thing: Five minutes feels long when you’re hungry. It’s worth it.
- Sugar Isn’t Just Sweet: It helps the yeast wake up. Don’t skip it out of fear.
- Thin Is Better: Thick crust sounded nice. It was not.
- Cracks Are Normal: The dough will crack a little while baking. That’s not failure. That’s gluten free life.
- Grease Everything: Your pan, your hands, probably your expectations.
- Par-Bake Is Non-Negotiable: Skip this step and you’ll get soggy sadness.
- Stop Overthinking It: This dough does not need perfection. Neither do you.
The Best Gluten-Free Pizza Crust Recipe
Ingredients
Method
- Turn the oven on first.
- Set it to 350°F (176°C). I forget this step more than I’d like to admit, so I’m saying it again.
- Wake up the yeast.
- In a small bowl, mix the yeast with ¾ cup warm water. Let it sit for 5 minutes.
- After a couple minutes, sprinkle in 1 tablespoon of the sugar and let it get foamy.
- Mix the dry stuff.
- In a larger bowl, whisk together the gluten free flour, salt, baking powder, and the remaining sugar.
- Bring it together.
- Make a little well in the dry mix. Pour in the yeast mixture, olive oil, and the remaining ½ cup warm water.
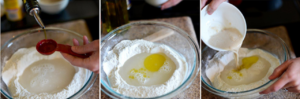
- Stir with a wooden spoon until it looks like sticky dough and not soup.
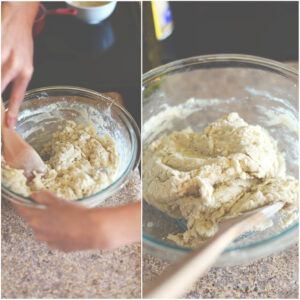
- Shape the crust.
- Grease a baking sheet or pizza stone generously.
- Spread the dough out using your hands, starting from the center and pushing outward.
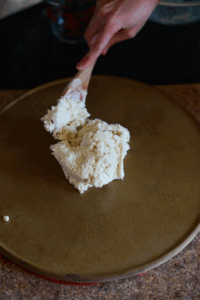
- If it sticks, sprinkle a little brown rice flour on your hands.
- Keep it thin, less than ¼ inch if possible.
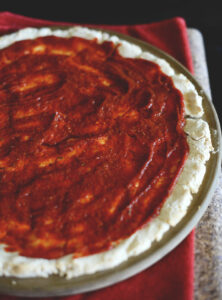
- Par-bake the crust.
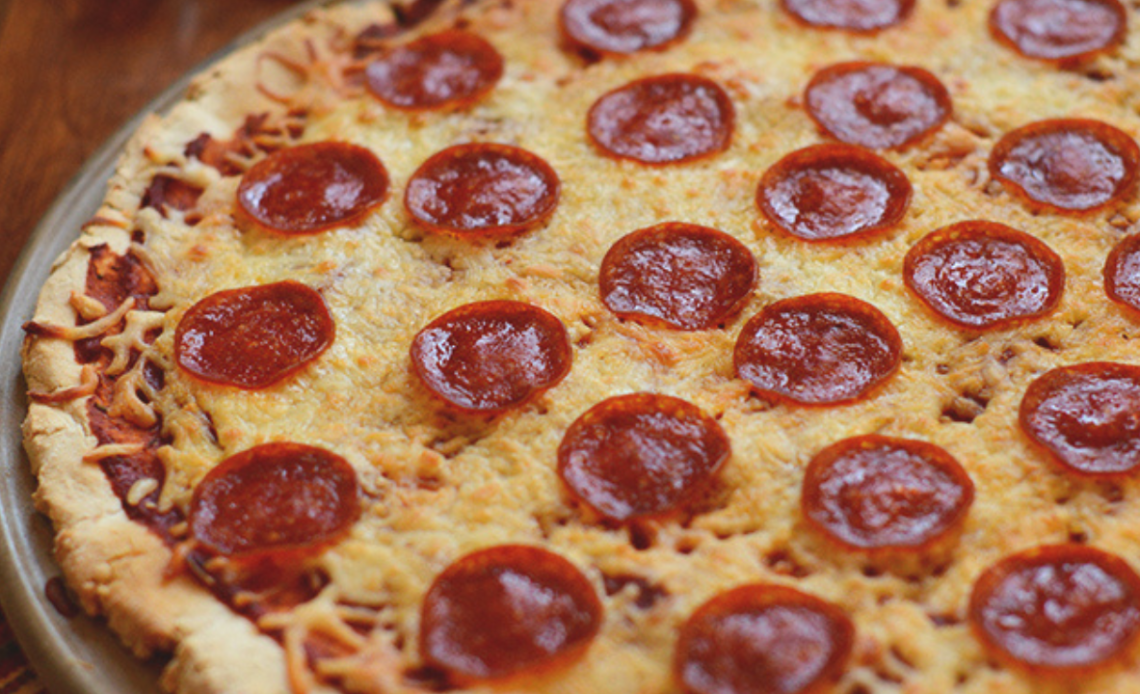
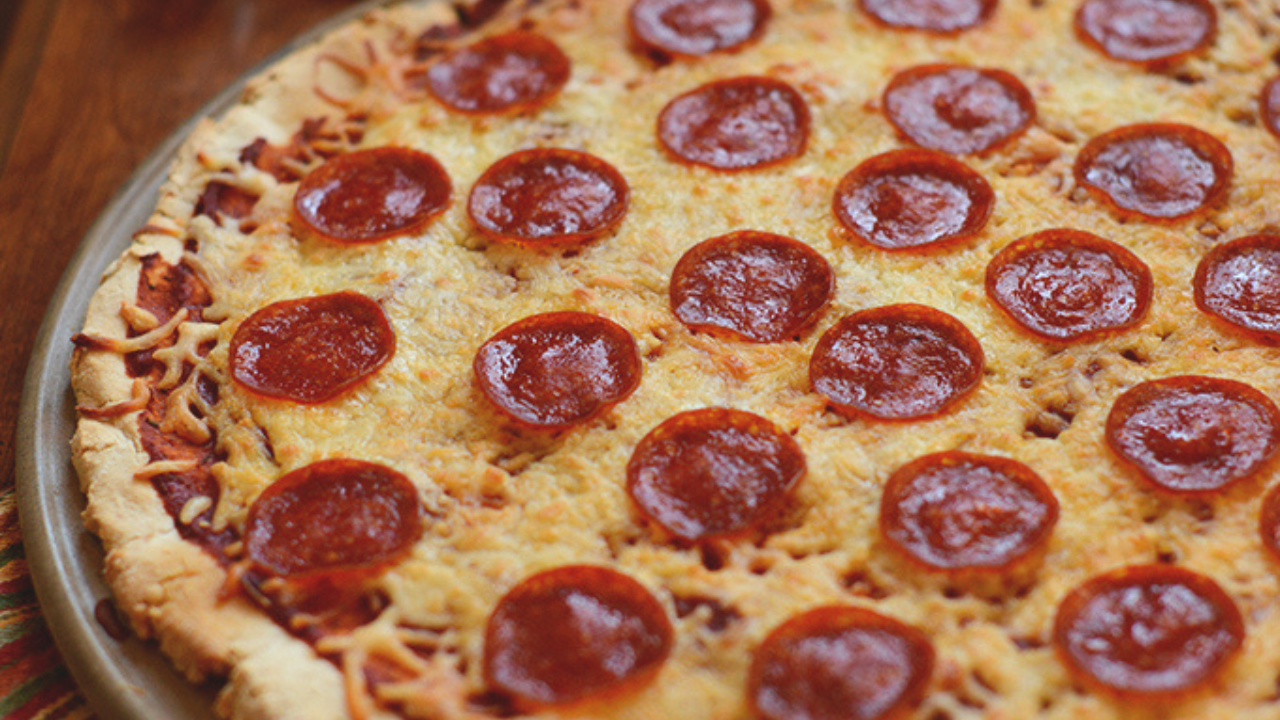
- Bake for 20 to 25 minutes, until it looks dry and slightly cracked.
- Cracks are normal. Panic is not required.
- Add toppings.
- Take it out, add sauce, cheese, and whatever toppings you’re feeling that day.
- Bake again.
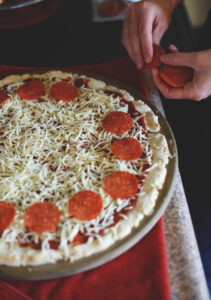
- Put it back in the oven for 15 to 25 minutes, until the edges are lightly golden and the toppings are warm and bubbly.
- Slice and eat immediately.
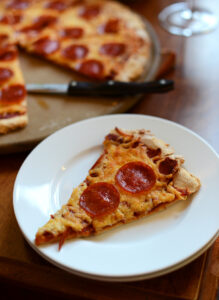
- Waiting is optional. I usually don’t.
Notes
Variations You Can Mess Around With
- Spicy Mood: Add chili flakes or hot sauce to the dough.
- Garlic Everything: Mix garlic powder into the flour because garlic fixes moods.
- Lazy Version: Use store-bought sauce and whatever cheese is closest.
- Extra Herbs: Toss dried basil or oregano into the crust for pizza shop vibes.
- Crispier Edge: Brush the edges with olive oil before baking.
- Sweet Twist: A tiny bit more sugar in the dough works surprisingly well.
- Personal Pizzas: Make smaller ones so everyone feels important.
- Experimental Night: Try weird toppings. Worst case, you order takeout.
How I Like to Serve This
- Weeknight Dinner: Straight from the pan to a plate. No ceremony.
- Friends Are Over: Cut into slices and act casual about it.
- Solo Couch Meal: Eaten with one hand while scrolling.
- Movie Night: Paired with whatever snack I also shouldn’t be eating.
- Next-Day Lunch: Cold or reheated. Both acceptable.
- Make-Your-Own Night: Everyone adds toppings and argues about pineapple.
Storage, Leftovers, and Next-Day Thoughts
- Fridge Friendly: Keeps for a day or two without turning weird.
- Wrap It Well: Air is the enemy here.
- Reheat Gently: Oven or microwave both work. Don’t blast it.
- Freezer Option: Par-bake the crust and freeze up to a month.
- Texture Changes: Slightly chewier the next day, still good.
- Next-Day Upgrade: Flavors calm down and get cozy overnight.
FAQs (Real Questions People Actually Ask)
Can I make this ahead of time?
Yes. I’ve made the dough a day early and kept it covered in the fridge. Fresh is best, but life happens.
What if I don’t have the exact flour blend?
Use what you have. This crust is forgiving. Just aim for a gluten free mix that includes some starch.
Is it supposed to look cracked?
Yes. If it cracks a little, it’s doing its thing.
Can I freeze it?
Absolutely. Par-bake first, then freeze. Future you will be grateful.
Mine feels sticky. Did I mess up?
Nope. Sprinkle a little more brown rice flour and keep going.
Do I really need to pre-bake it?
Yes. I tried skipping it once. Regret was immediate.
Can I use regular flour instead?
You can, but this recipe was built for gluten free. Adjustments may happen.
Why is my crust pale?
Give it more time. Gluten free dough takes patience.