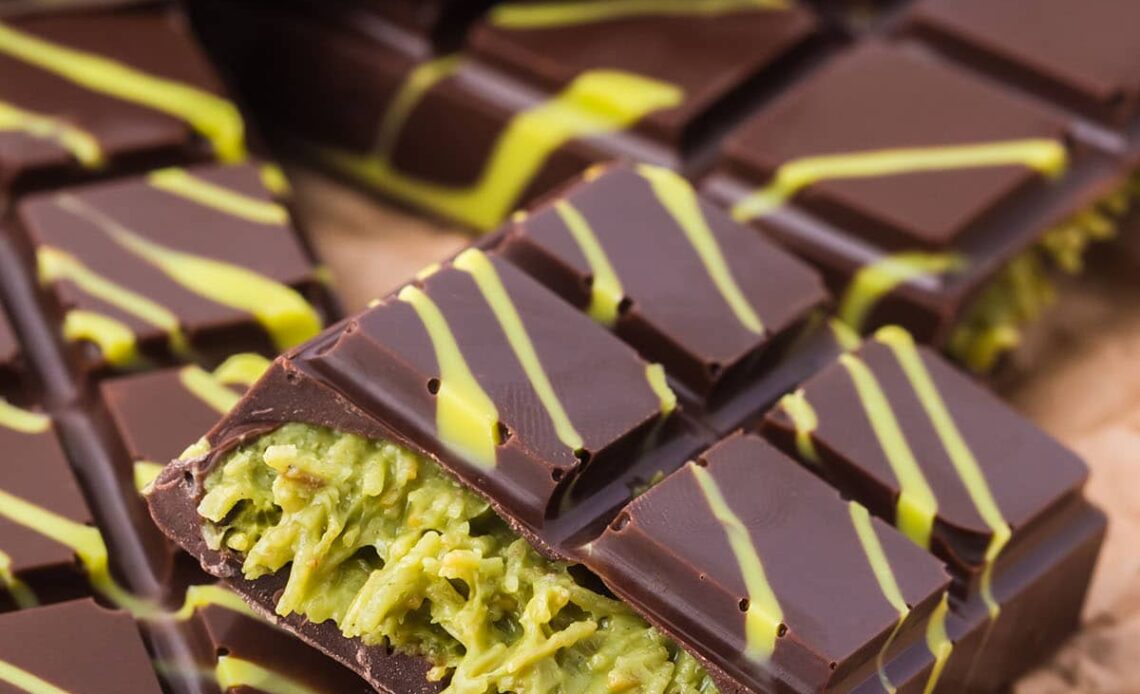
A Dubai chocolate bar is the kind of treat that feels luxurious from the very first bite. With its glossy chocolate shell and rich pistachio filling, it looks like something you’d pick up from a high-end chocolate shop, yet it’s surprisingly simple to make at home.
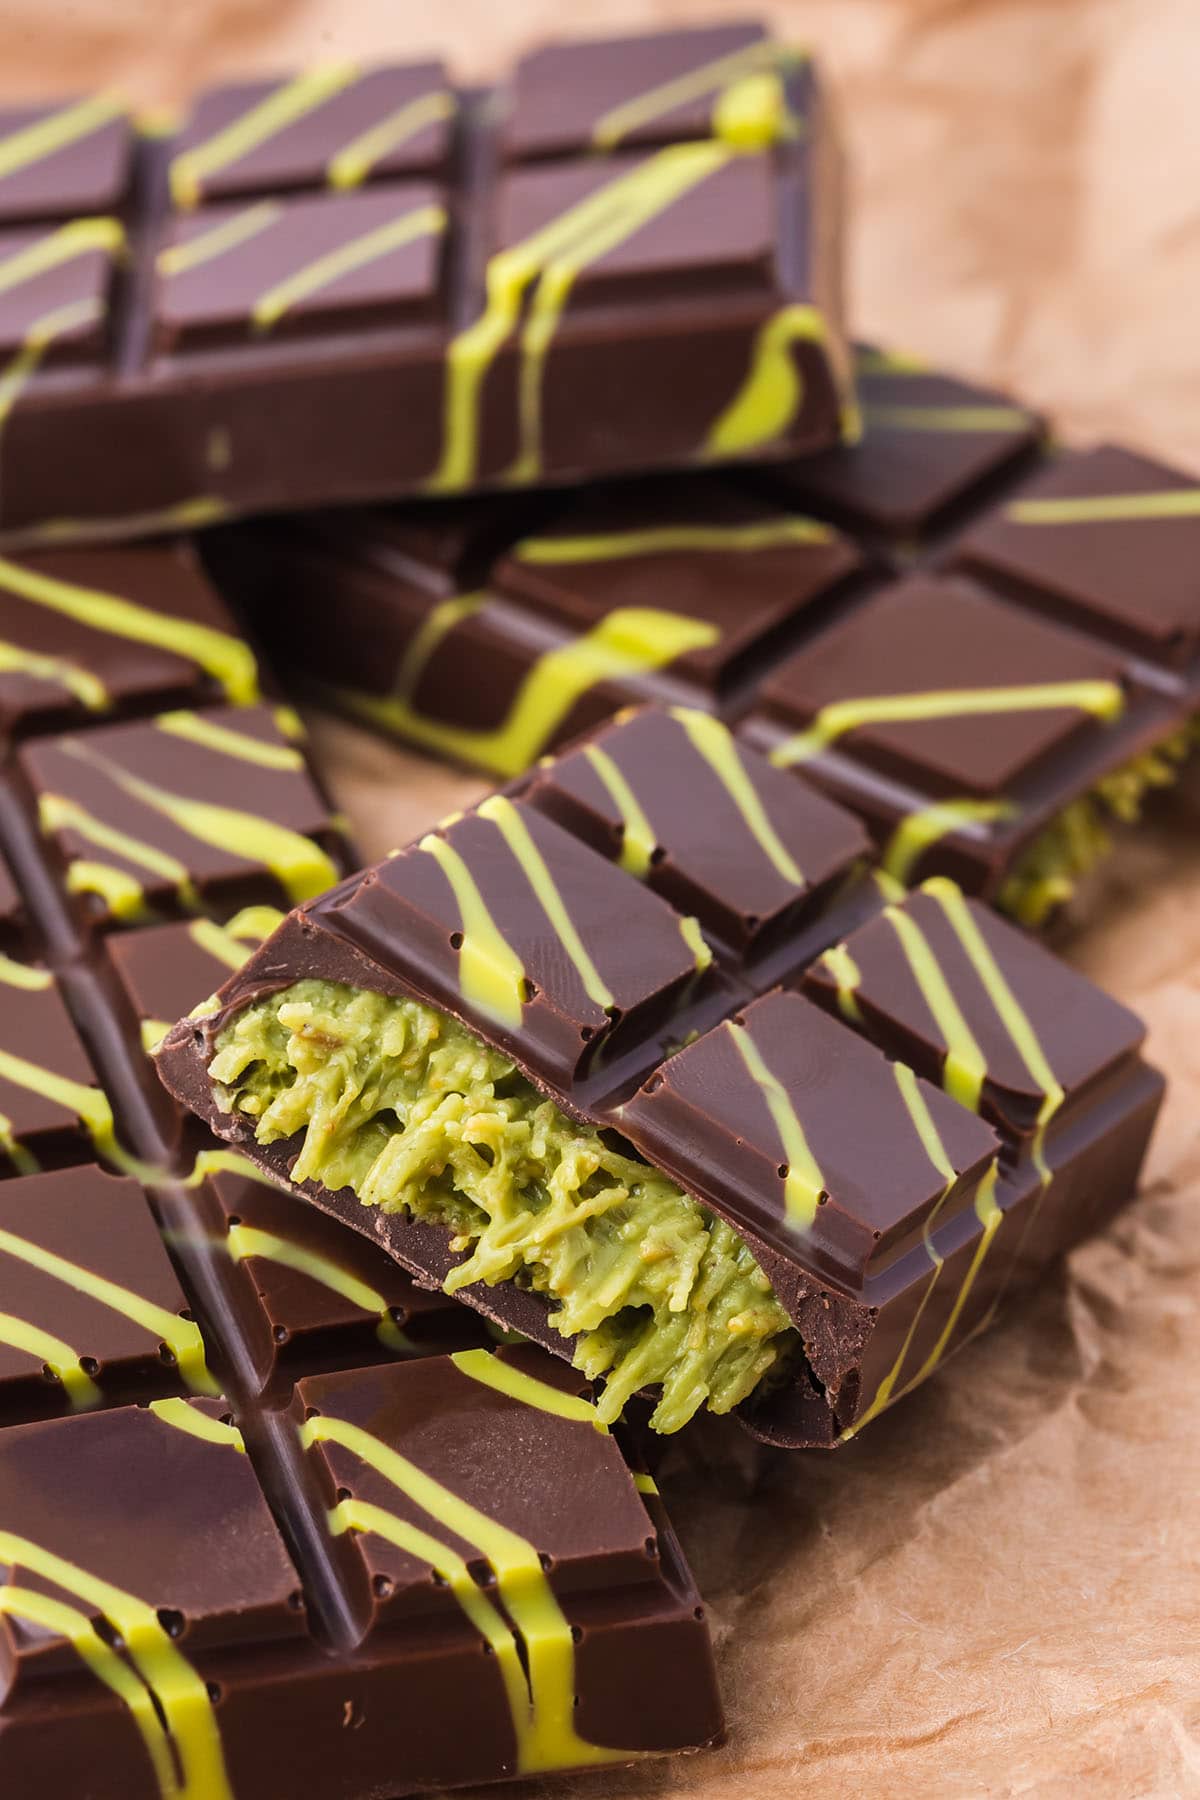
What makes this dessert stand out is the contrast in textures. The outer chocolate layer is smooth and firm, while the inside is creamy, nutty, and slightly crispy thanks to the toasted kataifi pastry. Every bite feels indulgent and satisfying.
The flavor combination is just as impressive. Pistachio butter and tahini create a deep, nutty richness that pairs beautifully with the sweetness of the chocolate. It’s balanced, unique, and not overly sugary.
Best of all, this recipe doesn’t require tempering chocolate, making it approachable even if you’re new to candy-making. With just a few ingredients and a mold, you can create something that feels truly special.
Why I Keep Making This Dubai Chocolate Bar?
This recipe has become a favorite because it delivers a premium dessert experience without complicated techniques. It’s simple enough for everyday cooking but elegant enough for gifting or special occasions.
The pistachio filling is one of the main reasons I keep coming back to it. It’s creamy, slightly crunchy, and packed with flavor, making it far more interesting than a typical chocolate bar.
I also appreciate how customizable it is. You can play with different chocolate types or fillings, which keeps the recipe fresh and exciting every time.
Another reason is convenience. These bars store well, so you can make them ahead and enjoy them whenever you want a sweet treat. It’s a recipe that feels both creative and rewarding without being overly time-consuming.
Variations You Can Mess Around With
- Use dark chocolate instead of milk chocolate for a richer taste.
- Add crushed pistachios for extra crunch in the filling.
- Swap pistachio butter with almond or hazelnut butter.
- Add a drizzle of caramel inside for a sweeter twist.
- Sprinkle sea salt on top for a sweet-salty contrast.
- Use white chocolate for a different flavor profile.
- Add a hint of rose water for a Middle Eastern-inspired touch.
Pro Tips for Perfect Results
- Use good-quality chocolate. It makes a big difference in flavor.
- Do not overheat the chocolate. This can affect texture and taste.
- Toast the kataifi gently. Burning it will create a bitter flavor.
- Leave space around the filling. This helps seal the chocolate properly.
- Chill between layers. This ensures clean and defined layers.
- Use a sturdy mold. It helps the bar keep its shape.
- Let the bar set completely before removing. This prevents breakage.
How to Make a Dubai Chocolate Bar?
Ingredients
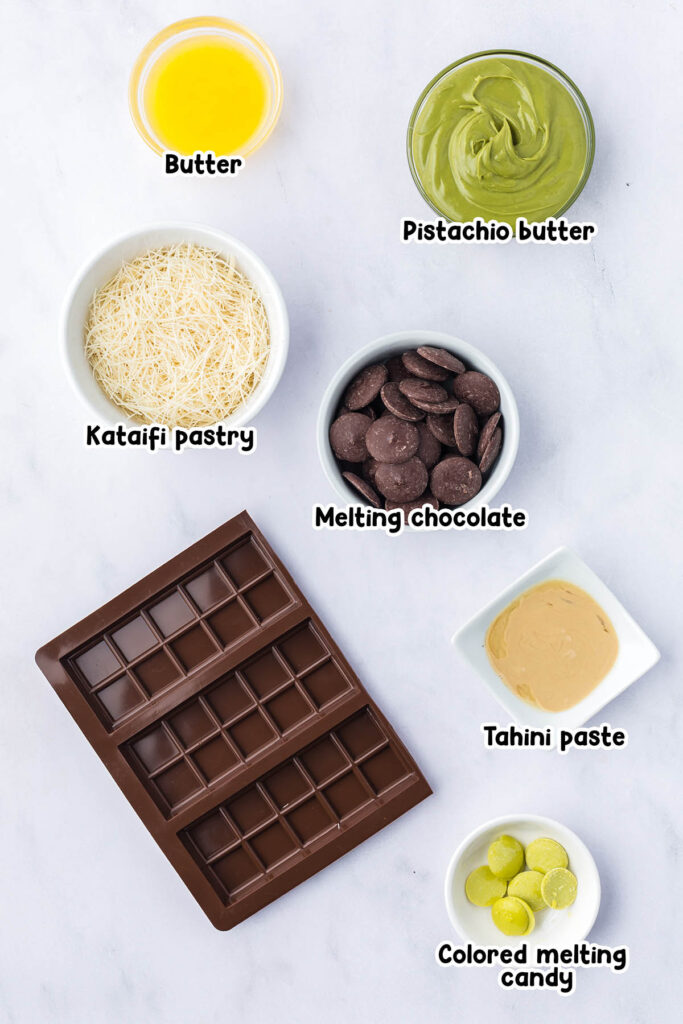
- 3 tbsp colored or white melting candy
- 2 cups melting chocolate, divided0
- 1 cup kataifi pastry, chopped
- 1/4 cup unsalted butter, melted
- 1/2 cup pistachio butter
- 1 tbsp tahini paste
Equipment
- Candy bar mold
- Mixing bowl
- Skillet
- Spatula
- Knife or scraper
Instructions
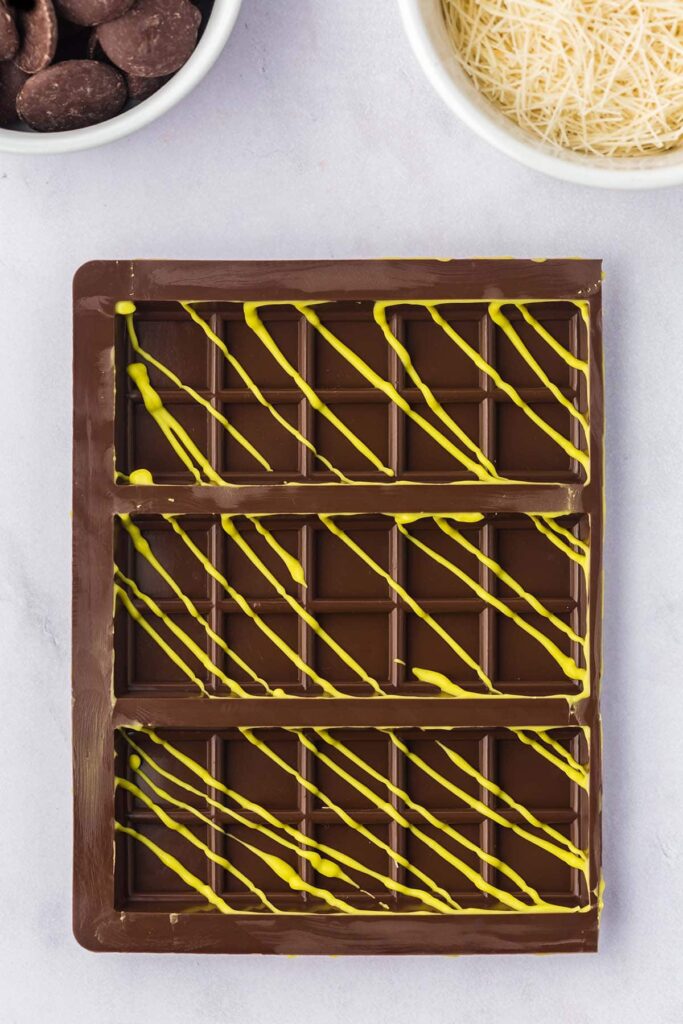
Step 1:
Melt the colored or white melting candy according to package directions, then drizzle it into a clean candy mold in any pattern you like before chilling it until firm.
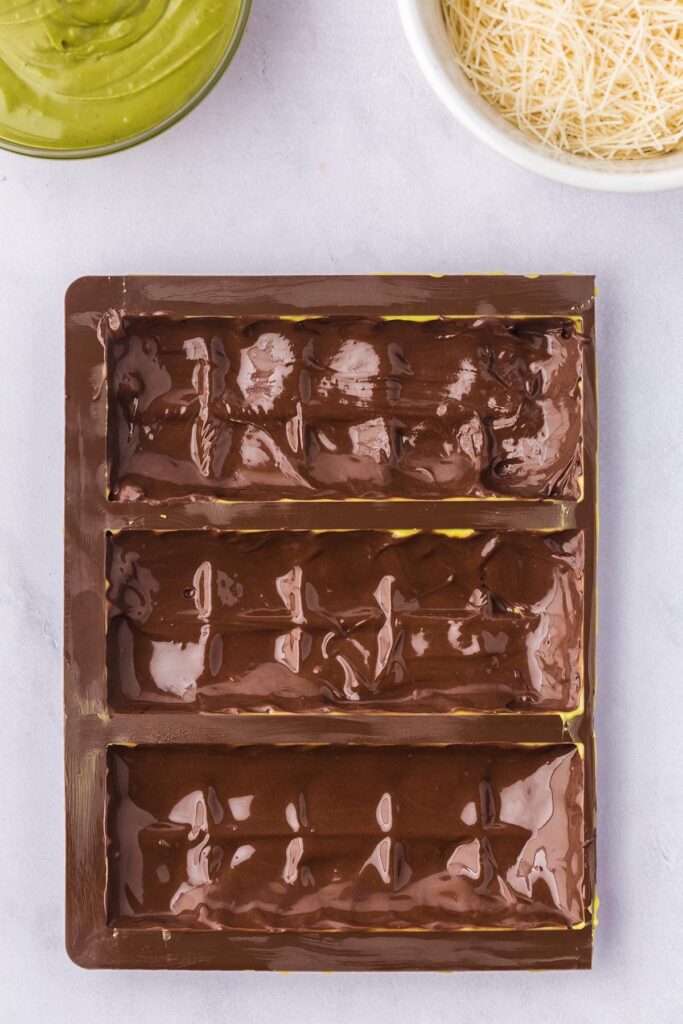
Step 2:
Melt half of the chocolate and spread it evenly over the bottom and sides of the mold, then remove excess and chill again until fully set.
Step 3:
Toast the kataifi pastry in a skillet with melted butter over medium heat until golden and crisp, then set it aside to cool slightly.

Step 4:
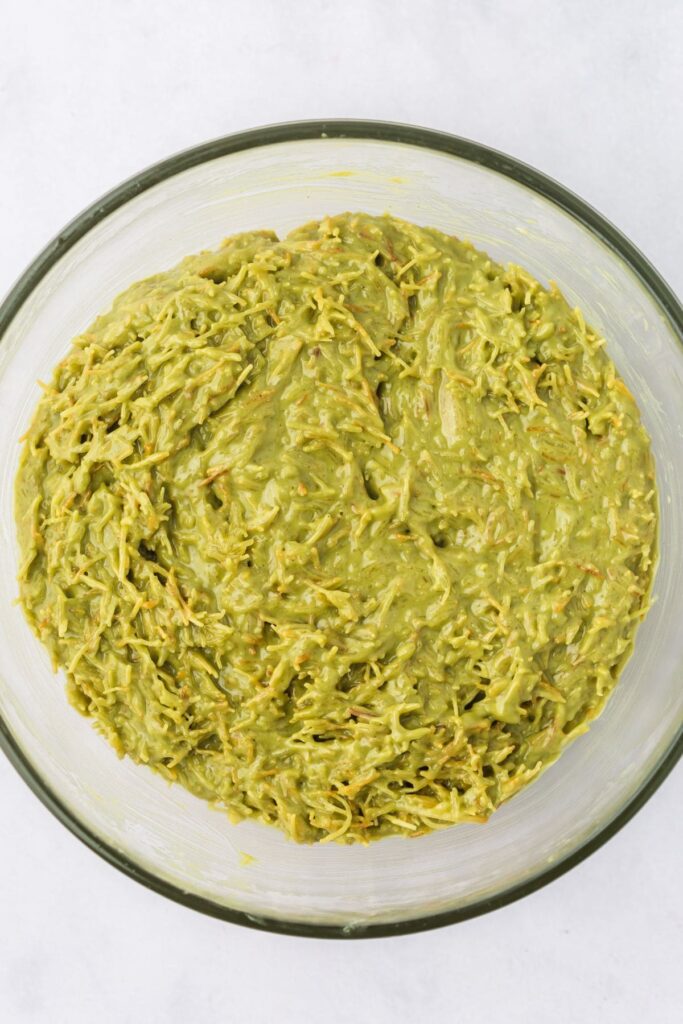
Mix pistachio butter and tahini in a bowl, then fold in the toasted kataifi until the filling is evenly combined.
Step 5:
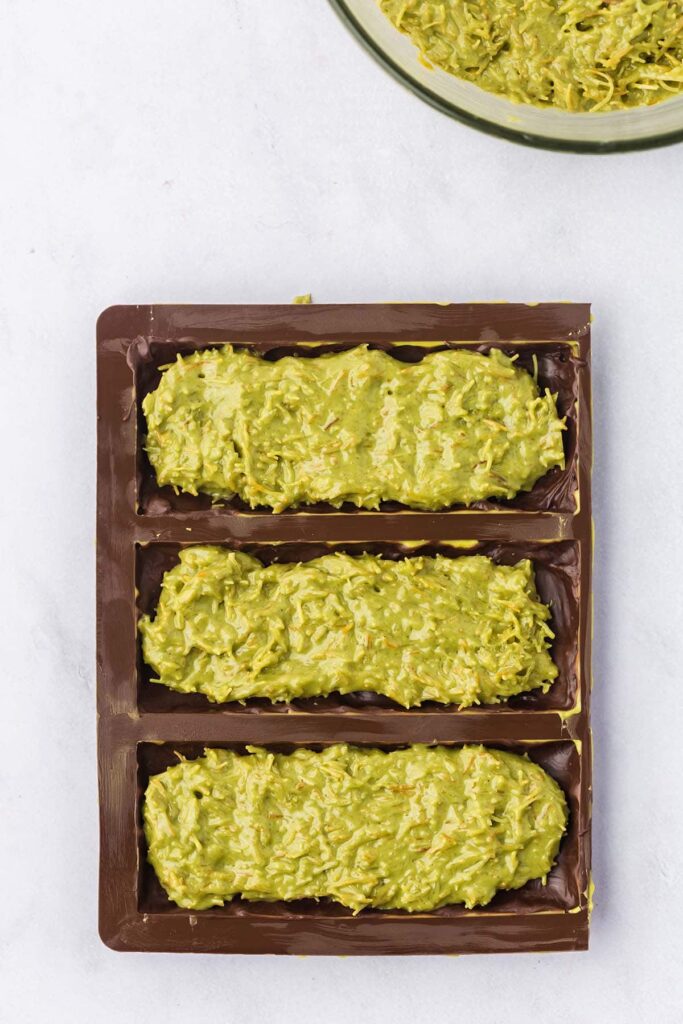
Spread the filling into the chocolate-lined mold, leaving a small border around the edges so the chocolate can seal the bar.
Step 6:
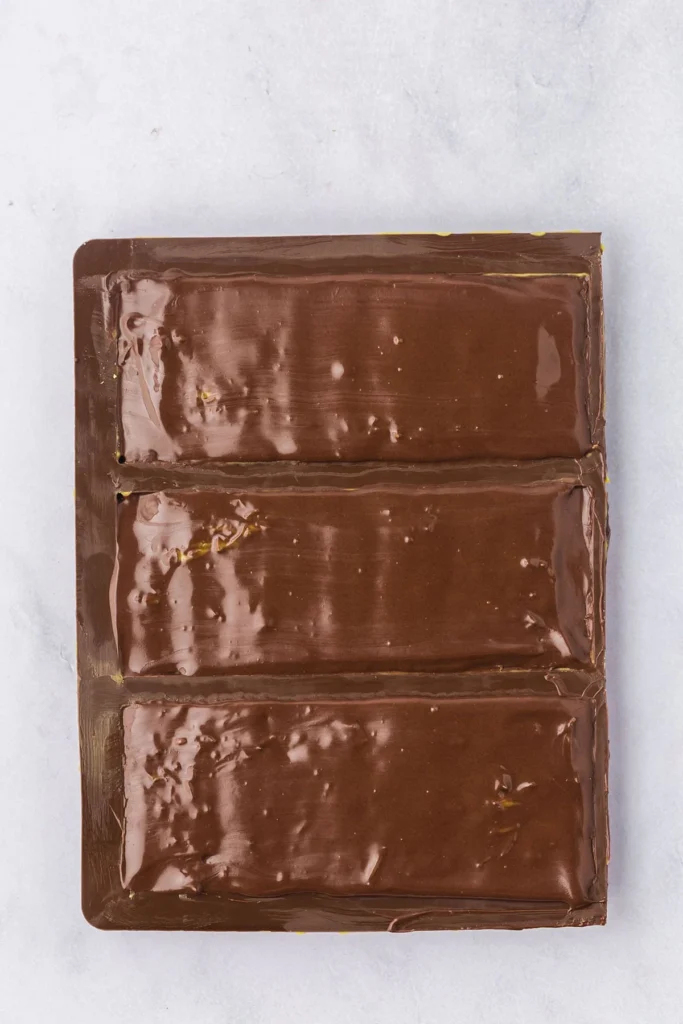
Melt the remaining chocolate and pour it over the filling, spreading it evenly and smoothing the surface before removing any excess.
Step 7:
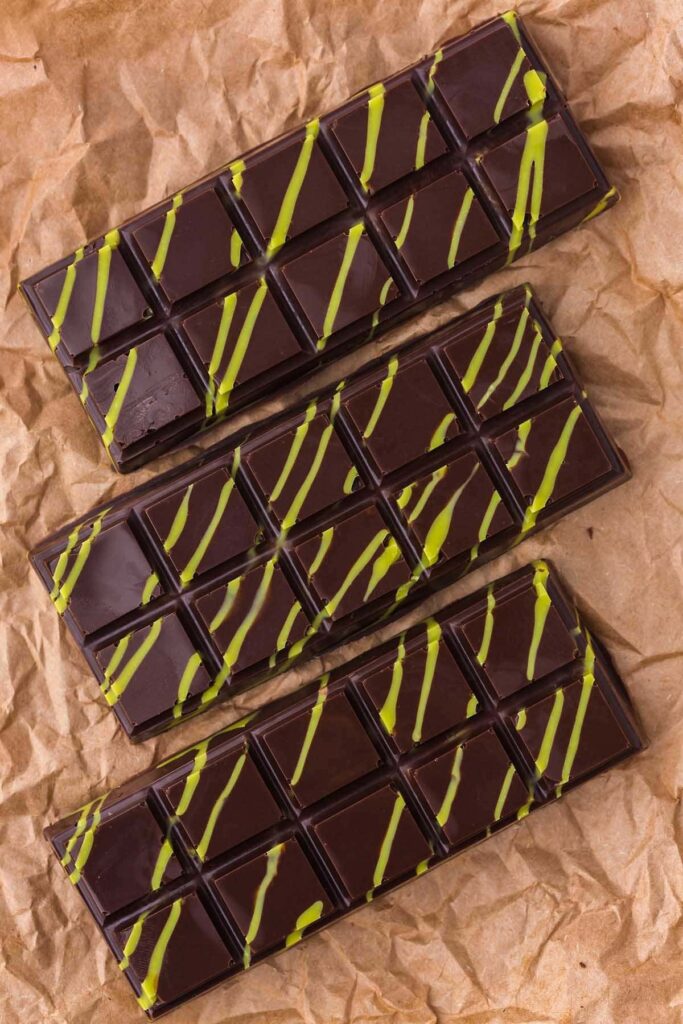
Chill the filled mold until completely firm, then carefully remove the chocolate bar and serve.
Dubai Chocolate Bar Recipe
Ingredients
Equipment
Method
- Melt the colored or white melting candy according to package directions, then drizzle it into a clean candy mold in any pattern you like before chilling it until firm.
- Melt half of the chocolate and spread it evenly over the bottom and sides of the mold, then remove excess and chill again until fully set.
- Toast the kataifi pastry in a skillet with melted butter over medium heat until golden and crisp, then set it aside to cool slightly.
- Mix pistachio butter and tahini in a bowl, then fold in the toasted kataifi until the filling is evenly combined.
- Spread the filling into the chocolate-lined mold, leaving a small border around the edges so the chocolate can seal the bar.
- Melt the remaining chocolate and pour it over the filling, spreading it evenly and smoothing the surface before removing any excess.
- Chill the filled mold until completely firm, then carefully remove the chocolate bar and serve.
Notes
Nutrition Information
| Nutrient | Amount per Serving |
|---|---|
| Calories | 1041 kcal |
| Carbohydrates | 121 gm |
| Fat | 64 gm |
| Protein | 11 gm |
Note: Nutritional values are approximate and may vary depending on ingredient size, quality, brand, location, and the proportions used. All nutritional information is calculated on a per-serving basis.
If you are following a medically restrictive diet, please consult your doctor or registered dietitian before preparing this recipe for personal consumption.
Common Mistakes to Avoid
- Overheating the chocolate. This can cause it to seize or lose its shine.
- Skipping the chilling steps. Layers may not set properly.
- Burning the kataifi. This will affect the overall flavor.
- Overfilling the mold. This makes sealing difficult.
- Using a flexible mold incorrectly. It can break the design.
- Not smoothing the chocolate base. This affects the final shape.
- Removing the bar too early. It may crack or fall apart.
How I Like to Serve These?
- Serve slightly chilled for the best texture.
- Slice into smaller pieces for sharing.
- Pair with coffee or espresso.
- Wrap as a gift for special occasions.
- Serve on a dessert platter with other sweets.
- Add a sprinkle of crushed pistachios on top.
Storage / Leftovers and Next-Day Thoughts
- Store in an airtight container to keep fresh.
- Keep in the refrigerator for longer shelf life.
- Can be stored up to three months when chilled properly.
- Keep away from strong odors. Chocolate absorbs smells.
- Store at room temperature in a cool, dry place if serving soon.
- Avoid freezing. This can cause cracking when thawed.
- Texture remains rich and firm even after storage.
FAQs
Do I need to temper the chocolate?
No, this recipe uses melting chocolate, so tempering is not required.
Can I use a different filling?
Yes, you can experiment with other nut butters or fillings.
What is kataifi pastry?
It’s a shredded phyllo dough that becomes crisp when toasted.
How do I remove the bar cleanly?
Make sure it is fully set before gently removing it from the mold.
Can I make smaller bars?
Yes, simply use smaller molds or divide the mixture.